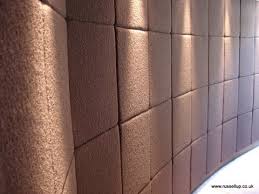
Procedure and safe work method statement for installation of Wall padding panels. Below is only step wise procedure and complete method statement will have all sections like scope, references, responsibilities, ITP, Checklists and risk assessments.
Description of Activity
Preparation of the Sub construction:
Lime/Cement plaster –The plaster must adhere firmly to the sub construction and must be uniformly hard.
Large particles must be scraped off and slops must be removed by grinding.1.3Excessive rough or uneven surfaces must be filled with cement -bond compound
Concrete Surface
Concrete surface must be deburred, if necessary and voids and joints be filled until the surface is smooth. Check whether residual form work oil will adversely affect the bonding.
If necessary, again grind the entire surface r wash with a suitable cleaning agent.
If filling necessary, use a cement based filler. Before filling, prime with suitable wash primer.
Brick work ( Unpainted ,plain)
Coat the brick work, several times if necessary, using cement bound filler. If necessary, sand may be added to the first coat of filler.
Before filling, prime with a suitable wash primer.
Alternatively, perforated clinker walls can be coated with fermacell, bonded to the entire surface area.
When covering the walls with particles board , joints must be filled with an elastic dispersion filling compound.
Old sub constructions
If sub constructions, already bonded with adhesive, or walls, surfaced with paint, are present in older halls, these are to be examined for their strength.
f necessary filler must be applied, using cement bound filing compound.
The sub construction must first be primed with a suitable wash primer. Gypsum filling compound are not suitable for filling purpose, since the moisture balance of the sub construction may be disturbed by the diffusion proof covering.
Fitting
There must be a suitable indoor climate condition when fitting the KLAPPER-shock absorbing material. The panels must be stored before fitting in a room kept at a moderate temperature of at least 18 degree Celsius. The storage and fitting temperature must be maintained for approx. 72 hours in order to attain adequate bonding strength.
Before fitting, the panels must be checked to ensure that they are from the same batch, of uniform colour and free from defects.
If necessary, highly absorbent sub construction must be coated with primer or wash primer.
Bonding of the KLAPPER-shock absorbing panels
Contact adhesive which are offered by the appropriate companies and which are solvent free , low solvent or depending on the conditions-which contain solvents, are suitable for bonding the material.
The adhesive must be applied on both sides according to the manufacturer’s instruction. Make sure that a minimum of 200 gr/Sq. is applied on each side.
After the evaporation time , the panels are positioned accurately , with the nap downward, and the entire surface is rolled using a special pressure roller, crosswise in relation to the seam and in the lengthways direction so that the application pressure is transferred optimally to the adhesive . The panels should be fitted vertical to the wall.
The avoid buckling the surface material must always face outside during transport and fitting. Rolling the other way will cause buckling which cannot be eliminated subsequently.
At outside corners, a cutting tool is used to cut a V shaped groove on the back in to the PE foam. Then the two foam edges are both coated with high grade contact adhesive, after the evaporation time , they are bent round and bonded together to form angles or edges.
An edge , as a return at the top of panels or at joints with doors or gate , is produced as follows:
a) Depending on the thickness of the PE-foam from the outer edge of the PE –foam , cut at right angles(vertically) as far the backing layer or the underside of the needle-fleece surface material.
b) The PE-foam is separated horizontally with a second cut
c) The resulting angle is coated with high grade contact adhesive and joined together after the specified evaporation time.
At door joints, a plastic angle profile e.g. schock profile EL-8 or similar must be fitted with one side projecting by 8 mm. This provide both a guided edge around the door and additional edge protection . In addition , the flexibility of the wall lining is maintained at the edge.
As a upper edge return, the bordering technique as already described or the use of a return profile, is recommended.
Fixing is assured by the use of a suitable assembly adhesive.
Discover more from
Subscribe to get the latest posts to your email.
