


Below is the list of required tools which shall be arranged before start of civil works for swimming pool works.
- Plaster spray machine
- Aluminium rod for leveling, water level, split level
- Trowel
- Scrapper
- Roller
- Drill for mixing
- Rubber hammer
- Tile spacer
- Air blower
- Sponge
- bucket
- Asphalt burner for torching the membrane
Method Statement for Civil works for Swimming Pool
Obtain necessary clearances and approvals from engineers including MEP clearance for existing and required underground utilities.
Selected working area should be barricaded to avoid accidents & damages.
Surface Preparation:
All concrete surfaces will be cleaned from any dust, grease, oil, curing agents, and other contaminants.
The honeycombed areas, cavities, recesses, chipped out areas and uneven surfaces shall be repaired with special approved concrete repair material.
Waterproofing Membrane:
The concrete substrate must be cleaned prior to the installation of membrane.
This will require the pool shell to be broom cleaned and then blown with an air compressor to remove all debris, dirt, and dust.
Surface conditioner should be spray or roller applied to the concrete surface and allowed to thoroughly dry, prior to the installation.
To complete the installation of the Torching waterproofing assembly the protection course is installed, such as for waterproofing application.
This is done as the membrane is being installed to achieve a good attained bond between them.
Applying waterproof membrane. At this point inspection and approval must be given by consultant engineer.
Ponding Test (water leakage test)
After torching waterproofing treatment, waterproofing layer shall be subjected to a ponding test after minimum 72 hours upon completion of waterproofing work.
Plug all outlets and fill the pool to overflow level for 48 hours.
Water shall be arranged & filled for pond testing.
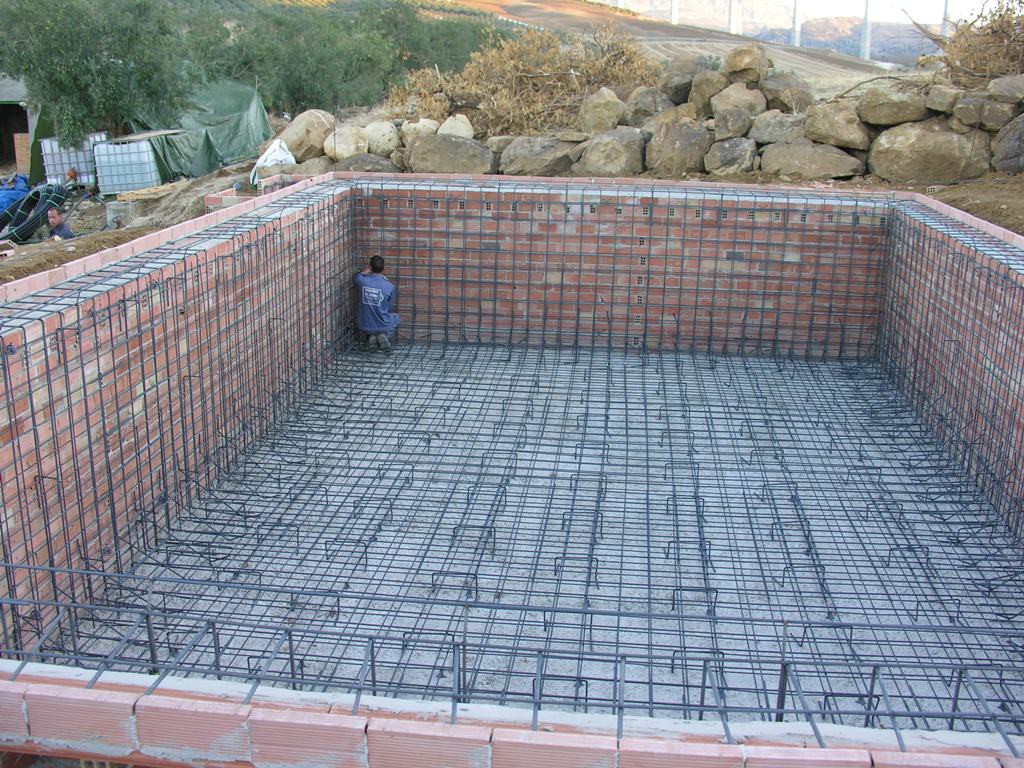
Laying of reinforcement must be inspected and approved by consultant.
Spraying of gunite mix to the floor, wall and overflow channel free of structure cracks and free of leaks must be inspected and approved by consultant
The surface must be inspected and approved by consultant before proceeding with any plastering works in order to ensure a smooth surface and to ensure that all the levels are correct as per approved shop drawings.
The bonding agents and the plaster material must be verified by consultant in accordance with the specification and approved MIRs.
The inside of pool surface is extremely smooth. Surface preparation prior to plastering needs; remove the dust, loose particles, grease and patches of salt from ultra-smooth surface of pool concrete to be rendered.
Spray sufficient amount of clean water to neutralize the suction of the background. Allow the free water to completely evaporate before the application of approved key coat.
After curing key coat (boding agent) with water 3-4 times a day for 2 days, then approve plaster material must be spray to the surface up to the required thickness (15-20 mm average) and then levelled to obtain smoothly finished surface and right angled swimming pool, for the application of the cementitious waterproof coat.
All pipe penetration, inlets, outlets shall be cut back around pipe penetrations at least 20 mm to give a sufficient depth and clean off thoroughly, in order to properly overlap & sealed them during the application of water proofing.
The plastered surface will be inspected by consultant to ensure smooth finishing surface which is properly leveled and ready for application of cementitious waterproof coating
Application of Cementitious Waterproofing coating
Cementitious waterproofing membrane is applied on the plastered surface only after the approval of the plastering works and the waterproofing material has been inspected and verified by consultant through MIR.
The cementitious waterproof coating liquid polymer usually (5 kg) is poured from the plastic container into a plastic or metal drum having a volume of at least 20 liters to this, the powder is gradually added (18 kg).
Pre- dampen the substrate surface with water.
High porosity substrate will require more dampening than dense substrates. Any condensation should be removed using a sponge.
When the concrete surface is damp, apply the material using a soft bristled brush or trowel.
The first coat should be applied at a minimum wet film thickness of 1 mm and should be well brushed into the surface.
Finish in one direction for a neat appearance. If the brush begins to drag during application, do no add water to the material, but dampen the surface again.
The first coat should be allowed to cure for a minimum of 5 hours.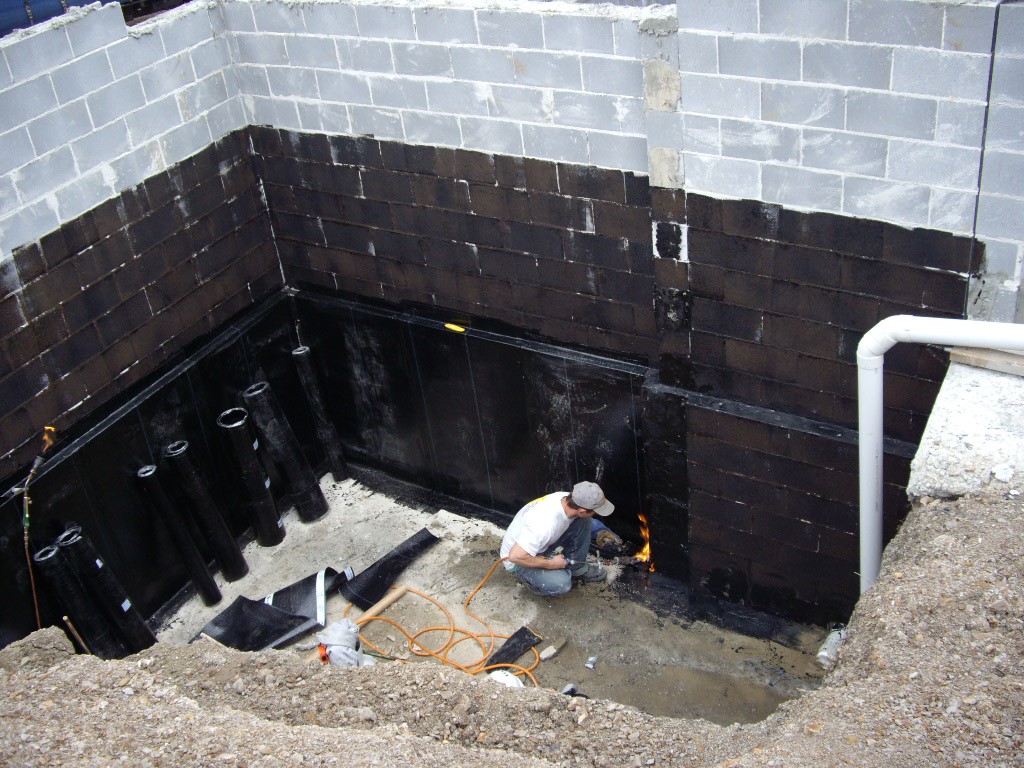

Second coat should also be applied at a minimum wet film thickness of 1 mm and finished in one direction.
Pre- dampening of the surface is not necessary when applying the second coat.
Subsequently a third coat may be applied at the same thickness (1 mm) with a roller and finished in one direction to obtain a level surface for the application of tiles.
After the application and curing of the waterproofing for minimum 72 hours after completion of waterproof, ponding test must be carried out for minimum 5 days with full filled swimming pool, only after the inspection and approval of consultant for waterproofing.
In order to ensure proper application of the waterproofing membrane strictly follow as per the instructions of the manufacturer and approved method statement.
In areas where any leaks are observed, rectification/ repair works on the waterproofing must be carried out to specific points as per the manufacturer’s instructions.
Tile Works for Swimming Pool
Prior to start tiling works, a mock up must be prepared which includes all the procedures starting from plastering up to grouting at a location which is acceptable to consultant so as to get approval from the architect for the final finished appearance of the tiled surface.
After approval of the mock up and prior to commencement of tiling works, the tile setting out must be carried out and obtained approval from consultant.
Tiling work shall commence from the walls and then proceed to the floor after ensuring application surface are sound and thoroughly clean
The tiles shall be bonded with the adhesive mixed in accordance with the manufacturer’s instruction.
Mix the material with a drill fitted with a suitable mixing paddle and mixing vessel for 2-3 minutes.
Glue is typically spread on the surface to a uniform thickness of minimum 2-6 mm and then combed horizontally.
Tiles are placed firmly into the adhesive bed ensuring good contact with a slight twisting motion.
Only apply to areas which can be tiled in the adhesive’s open wet time (1m2 at a time)
The tiles must be spaced with the most suitable spaced so as to achieve a uniform spacing between the tiles.
Tiles after laying shall be allowed to set for 24 hours before grouting the joints.
Grouting Instructions / Method
After ensuring that the adhesive has set, the joint shall be grouted with a cement based polymer modified grout fortified with adhesive admixture grout, in accordance to the manufacturer’s instruction. 6 liters of water is required for each 20 kg bag of grout.
After mixing, add grout to spaces between the tiles using sponge or s small piece of soft cloth.
Remove surplus material from the faces of the tiles with a dry cloth and run the tip of a glove finger along the grout to level it off and form a profile.
Protect the grout joints for at least 24 hours before allowing further work or foot traffic.
After work has been finished, the architect from consultant must inspect it.
Inspection to be submitted after completion of works and ensure its approval.
After obtaining approval, pool can be filled with water.