


Below equipment’s & tools shall be arranged before starting the process of roof waterproofing works.
- Measuring tape
- Cylinder fed propane torch
- Heavy duty press rollers
- Cotton waste
- Paint roller and paint brush
- Paint roller and paint brush
- Heavy duty scissors
- Thinner or solvent cleaner
- Broom brush
- Hand gloves
Method Statement for Roof Water Proofing in Steps with responsibility matrix
| No. | Description of Activity | Responsibility |
| 1.0 Foam Concrete works | ||
| 1.1 Substrate Preparation | ||
| 1.1.1 | Ensure that substrate should be free of oil, grease and made absolutely dry. Any dew settled or other dampness should thoroughly clean using a dry cloth. |
PE/SE |
| 1.1.2 | Honeycombs and spelled concrete to be repaired and all nailed heads and protrusions that are likely to puncture the membrane must be removed or ground. |
PE/SE |
| 1.2 Preparation For Slope | ||
|
1.2.1 |
Make level ribbis with slope |
PE/SE/Applicator |
|
1.2.2 |
Slope to be provided as per the approved shop drawing |
PE/SE/Applicator |
|
1.3 Foam Concrete Application |
||
|
1.3 |
Prepare the Foam Concrete by special mixer machine with above percentage rate for cement ,Water and foam chemical spec confoam,and incase the thickness exceed 100mm ,we will make 2 layers, and No need for control joint. |
PE/SE/Applicator |
| 2.0 Application of membrane | ||
| 2.1. Handling of Membrane: | ||
|
2.1.1 |
Membranes comes in rolls of 1.0 mtr. Width and 10.0 mtr length. Weight per roll ranges from 40 kg to 50 kg depending on the type of finish. Rolls are thoroughly shrink-wrapped and palletized to avoid any damage in transit or at site.
Membranes should be unloaded by suitable means ensuring no damage is caused to the membrane. |
PE/SE/Applicator
|
| 2.2 Storage of Membrane and Primer
|
||
|
2.2.1 |
Bituplus range of membranes should be stored in a shaded area with an ambient temperature of less than 35 deg C or on wooden pallets neatly covered by any thick fabric like tarpaulin sheets and tied and secured properly to ensure no excessive exposure to sunlight. Membrane should be stored vertically and should not be stacked |
PE/SE/Applicator |
|
2.2.2 |
Polyprime WB is a bituminous primer and all due care should be taken while working with a water base material. Store under cover / shade, out of direct sunlight and ensure that naked flames are kept well away from the containers |
PE/SE/Applicator |
| 2.3 Corner Details | ||
|
2.3.1 |
All internal corners should have a 45º fillet made of suitable cement sand mortar as tucking membranes into sharp corners would have gaps which would prove to be weak points |
PE/SE/Applicator |
| 2.3.2 | All external corners must be chamfered 20 X 20 mm with 45º. | PE/SE/Applicator |
| 2.4 Application for Membranes | ||
| Flat Horizontal surfaces | ||
|
2.4.1 |
The installation is performed using a cylinder fed propane torch, a trowel to seal the seams of the membrane and a knife for cutting membrane, if necessary. The membrane is aligned in the torching position. The desired length is cut and then re-rolled back for about half the length without changing its orientation. The membrane is slowly unrolled whilst the bottom surface is torched. Heating is carried out with a propane gas torch using left to right movements. Torching should be done in such a way that the square embossment of membrane becomes flat after bitumen is melt.
|
PE/SE/Applicator |
|
2.4.2 |
The next roll is then placed adjacent to the first one in such a way as to provide at least 100mm overlap on the joining side and 150mm end lap between rolls, staggering the joints where possible. Inspection of lap joints must be carried out to ensure total adhesion characteristics. |
PE/SE/Applicator |
Vertical surfaces: |
||
|
2.4.3 |
Application on vertical surfaces should be done with extreme care. A dimension of the area which needs to be waterproofed is taken and pieces of membrane cut accordingly. The membrane is held firmly in position and the bottom torched and fixed. Small portions are then torched and pressed against the wall. For best results, the torched section is pressed from the middle to the sides to avoid any air entrapment. |
PE/SE/Applicator |
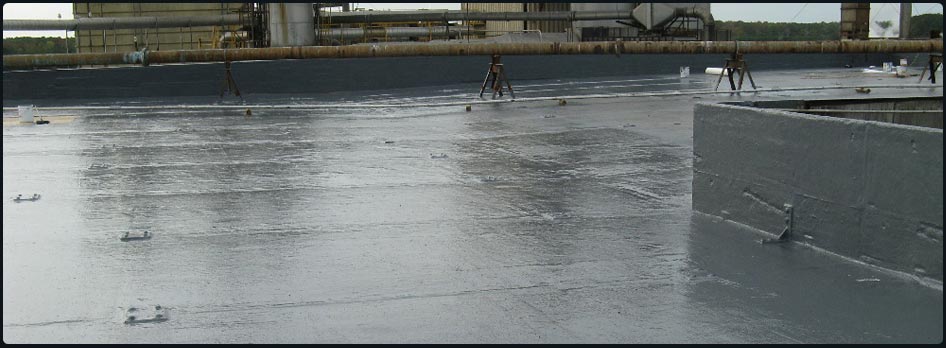
| 3.0 Description and sequence of Roof waterproofing : | ||
|
3.1 |
Supply and apply 100mm Average foam concrete and slope as per approved shop drawing. | PE/SE/Applicator |
|
3.2 |
Supply and apply 1 coat of Bitumen primer up of foam concrete. |
PE/SE/Applicator |
|
3.3 |
Supply and apply one layer of 4.00mm thick APP Waterproofing membrane Bituplus E4180 reinforced 180 gr/m2 non-woven polyester mat finish with overlap 10cm min. |
PE/SE/Applicator |
| 3.4 | Supply and apply one layer of 150mm polystyrene extruded 32-35Kg/m3. | PE/SE/Applicator |
| 3.5 | Supply and apply one layer of Geotextile SF40 Type on top off polystyrene. | PE/SE/Applicator |
|
3.6 |
River Washed Pebble or Roof Tiles. |
PE/SE/Applicator |
| 4.0 Roofing skirting | ||
| 4.1 | Supply and apply 4mm Th. Waterproofing membrane Bituplus E4180 mineral granular finish slated + Aluminum metal flashing + Sealant | PE/SE |