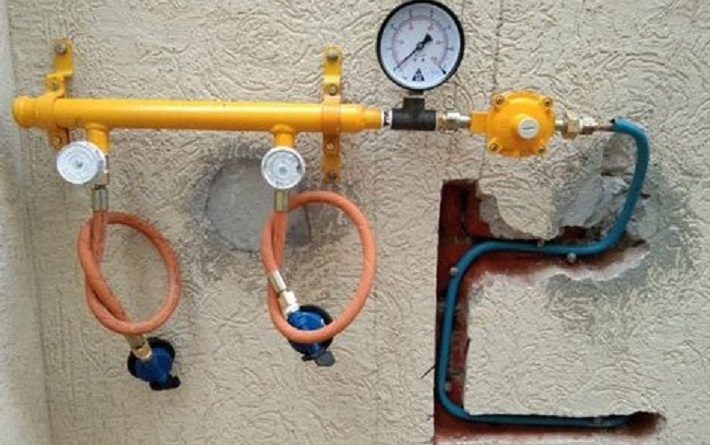
Below is a brief method statement for installation & testing of Liquefied Petroleum Gas LPG Piping System including the tank.
LPG System shall be installed & tested by specialist supplier approved for the project.
Ensure all civil works are completed for the area of installation, and clearance is obtained from respective authorities to proceed further.
Prior to start the installation, refer to the approved shop drawings related to the area of installation and ensure that required materials are available at site as per approved material submittals.
Ensure the materials are stored properly and there is no mark of damage or deformity of any kind before issuing the material from site store.
LPG Tanks shall be installed on the concrete foundations as per approved foundation drawings, ensure adequate space is available for valves, piping and future maintenance etc.
Ensure that foundation should be horizontal & smoothly finished from top. Painting to be completed if required in civil installation details.
LPG system Installation should be coordinated with other MEP services and obtain the approval of consultants and Local Authorities ( Civil Defense ).
PROCEDURE FOR THE INSTALLATION OF FILLING LINE
Filling line pipe used will be schedule 80 seamless carbon steel pipe will have 2 coat of red oxide primer and 2 coats of yellow paint for identification of Gas Line.
Install the pipe with suitable fittings according to the approved shop drawing & location.
Install the filling points as per approved drawing and location.
INSTALLATION OF LPG TANK
On tank foundations mark the holes needed and drill to install 14 mm unfix.
Install LP Gas Tank on the foundation with the help of tower crane.
Secure the LP Gas Tank with 14 mm bolts.
Install the LP Gas Tank fitting by using the PTFE tape.
Connect the filling line to Gas Tank.
Pressurize the Gas Tank with 10 bar Nitrogen Pressure & check for any leak with soap solutions.
If any leak found, repair the leak and again pressure the gas tank with 10 bar pressure.
The nitrogen will be kept in the tank and not released until the time of commissioning.
PROCEDURE FOR THE INSTALLATION OF DROPPERS
Dropper pipes used will be hard drawn 15 mm copper pipes.
These pipes will have 2 coats of yellow paint for identification of gas pipeline.
Install the pipe with suitable fittings according to the approved shop drawing & location.
Dropper pipe will be pressure tested at 6 bar nitrogen pressure.
PREPARING THE PIPES
The pipe will be cut to the required length, the cut will be straight by using the suitable copper pipe cutter.
Pipe will be cut 90% only using by pipe cutter, remaining will be broken by hands.
Cleaning of the portion where welding is required is done by cloth if required.
BRAZING PROCEDURE
- Pipe end will be inserted in to the fittings.
- Heat will be directed to the connection until achieving the brazing temperature.
- Filler material will be applied at the connection.
- Finally heat will be directed to the whole connection to allow the material to settle at the right place.
PROCEDURE FOR INSTALLATION OF KITCHEN EQUIPMENT
Gas Meter and accessories such as Gas Meter, Manual Valve, Solenoid Valve, Second Stage Regulator will be assembled in the supplier work shop prier to shipment on site.
Assembled Gas Meter and accessories will be installed on the site as per approved drawings and connected to droppers by 12 mm copper coils.
Electrical connection for solenoid valves will be done as per approved drawings.
Pressure testing will be done along with droppers.
INSTALLATION OF GAS CONTROL PANEL
- Gas Control Panel will be installed near the fire alarm panel as per approved drawings.
- Gas Detector will be installed in all shafts and O.T.S, where Gas Pipes are installed and connected to Gas Control Panel.
- Interfacing between Gas Control Panel and Fire Alarm Panel will be done as per Civil Defense requirement.
TESTING OF LPG SYSTEM
- Ensure installation of all piping is completed and all joints are ok.
- Check all joints.
- Identify the section to be tested, make a pressure test with the use of nitrogen gas.
- First purge the pipes with nitrogen and then start filling and pressurizing the pipes with nitrogen gas.
- Dropper pipe will be pressure tested at 6 bar nitrogen pressure.
- Test pressure will be minimum 1.5 times the maximum working pressure.
- Check for leakage, if any leakage found, rectify the leakage and apply pressure again.
- All the installation and pressure testing to be inspected and approved by the consultant.
