
In order to do the honeycomb concrete repair work for structural element all necessary machines and tools shall be arranged like mixer machine, wheelbarrows, wire brush, angle grinder, measuring tapes, and other handy tools.
Below is the repairing material for reference purpose, it can be any suitable equivalent local materials as per the locality of the project / building. All material shall be properly stored as per manufacturer instructions.
- Sika MonoTop – 610MY
- Sika MonoTop – R
- Sika Grout 215
All health and safety procedures and regulations shall be complied. Also it is important to provide proper and safe access for inspection and working activities. Site personnel must be in proper safety working attire e.g. Safety boots and helmets must be worn at all times. Proper and adequate lighting to be provided when working at night. In order to ensure the quality of honeycomb concrete repair works meet the requirement, inspection and test shall be carried out as per the Project Quality Plan (PQP).
Concrete Repair Method No. 1 – Re-cast Concrete Structure
1.1 Identify and demarcate the member which need to be demolished.
1.2 Erect adequate temporary props to support the affected slab and beam.
1.3 Demolish the severe concrete structure by means hacking with pneumatic tools. Ensure the edge of the concrete is clean, sound and free from dirt or dust.
1.4 Care should be taken not to damage the existing reinforcement of the beam and slab.
1.5 Bonding Preparation – Apply one coat of bonding agent Sika Monotop – 610MY at the edge of existing concrete to receive new concrete.
1.6 Formwork – Erect formworks at the demolished area and secure the formwork with suitable ties.
1.7 Request for inspection as per inspection checklist for concreting
1.8 Pour ready-mixed concrete Grade 40 with waterproofing admixture to the prepared formwork. Ensure the concrete have sufficient vibration during concreting.
1.9 On completion carryout joint inspection to sign on inspection checklist for post concrete.
Method 2 for Concrete Repair- Formwork Grouting
2.1 Based on structural repair layout, mark on existing structure such as concrete honeycomb.
2.2 Surface Preparation – Cut and hack around at demarcated honeycomb area with suitable tool and equipment. Ensure all loose concrete must be removed down to sound concrete. (Note: Do not use an impact hammer greater than 15 pound)
2.3 Clean existing reinforcement and clean/remove debris or loose concrete fragment from the rectification area.
2.4 Request for inspection as per inspection checklist for concrete repair.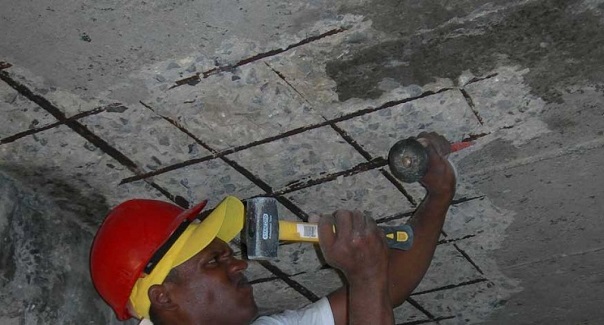
2.5 Formwork –Install form works that cover the size of the repair area including place a layer of sponge at the perimeter with suitable tied.
2.6 Install Inlet And Outlet – Drill two rows (upper and lower part) of 25mmØ holes on the formwork to insert 25mmØ UPVC pipe with spacing of 600mm c/c.
2.7 Mix the pre-bagged polymer modified shrinkage compensated high strength grout – Sika Grout with adequate water in a mixing drum. 6mm to 10mm aggregate shall be added and mixed with the grout at a ratio of 1:1 by weight to minimize heat generation.
2.8 The Sika Grout 215 concrete grout is then poured into the pump. Pump the grout into the form work with the lowers injection port until the grout is going out from the upper port.
2.9 Curing – Leave the formwork in place for at least 24 hour. Upon removal of the formwork, cure the exposed surfaces immediately with water.
2.10 On completion carryout joint inspection to sign on inspection checklist for concrete repair.
Method 3 for Concrete Repair- Formwork Grouting for honeycomb depth > 20mm
3.1 Based on structural repair layout, mark on existing structure such as concrete honeycomb.
3.2 Surface Preparation – Cut and hack around at demarcated honeycomb area with suitable tool and equipment. Ensure all loose concrete must be removed down to sound concrete. (Note: Do not use an impact hammer greater than 15 pound)
3.3 Clean existing reinforcement and clean/remove debris or loose concrete fragment from the rectification area.
3.4 Request for inspection as per inspection checklist for concrete repair.
3.5 Formwork –Install formworks that cover the size of the repair area including place a layer of sponge at the perimeter with suitable tied.
3.6 Install Inlet And Outlet – Drill two rows (upper and lower part) of 25mmØ holes on the formwork to insert 25mmØ UPVC pipe with spacing of 600mm c/c.
3.7 Flowable Sika Grout 215 – Place about 4.0 to 4.4 litres clean water into clean container; add the whole bag of Sika Grout 215 (25kg) while continuously mixing. After mixing, stir lightly with a spatula for few seconds to release any entrapped air.
3.8 The Sika Grout 215 concrete grout is then poured into the pump. Pump the grout into the form work with the lowers injection port until the grout is going out from the upper port.
3.9 Curing – Leave the formwork in place for at least 24 hour. Upon removal of the formwork, cure the exposed surfaces immediately with water.
3.10 On completion carryout joint inspection to sign on inspection checklist for concrete repair.
Method 4 for Concrete Hand Patch Repair (for area < 0.5m2 at depth < 20mm)
4.1 Based on structural layout, mark on existing structure such as concrete honeycomb.
4.2 Cut around demarcated honeycomb area to eliminate feather edge.
4.3 Surface Preparation – Repair area shall be clean, sound and free from all loosely adhering particles.
4.4 Bonding Preparation – Apply one coat of bonding agent Sika Monotop – 610MY “wet on wet” to the rectify area.
4.5 Request for inspection as per inspection checklist for concrete repair.
4.6 Concrete Mixing – The cement mortar Sika Monotop – R should be mixed in a clean drum. Place 3.4-3.5 liters of water in to the drum and add Sika Monotop – R slowly while mixing.
4.7 Application – Work wet on wet the mixed mortar well into the rectify substrate, using a placing suitable tools, compact well. Steel trowel the final coat if required.
4.8 On completion carryout joint inspection to sign on inspection checklist for concrete repair.