
This method statement describes the procedure for installation of above ground drainage piping system.
Document applies to the inward site inspection, installation and inspection methods to be adopted for the above ground drainage piping system.
Project manager is overall responsible for the process implementation of the works. The Construction Manager/Site Engineer will be responsible for all construction activities at the site and will directly supervise through erection supervisor/ skilled workmen the work at site. The Site Engineer will be responsible for arranging and controlling the inspection and testing activities.
Furthermore, it is the responsibility of each individual employed in the project to take due care to ensure their own personal safety and that of their work colleagues.
The work methods are summarized as follows:
Preparation of the Works
Delivery and inspection of Drainage and Vent Piping materials upon delivery at site.
Setting out of works
Installation of above ground drainage piping system
Inspection of above ground drainage piping system
Necessary Tools & Equipment
PPE for all staff and labor
Measuring tape and setting out markers
Electric Drill hammer
Pipe Fitters tool box
Certified mobile scaffolds/step ladder
Preparatory Piping Installation Requirements
Prior to installation of drainage and vent piping works, the supervisor and foreman will verify and ensure that all the safety requirements have been complied with and are in place.
Plumbing supervisor will verify that all relevant approved latest revisions of shop drawings, technical submittals, inspection and test plans are in the work place for installation reference. This also includes installation procedures.
The supervisor and foreman will inspect all the materials delivered to the work place and ensure that these are the required materials and also for damage or defect.
Materials found not to be as per requirement or with damage or defect will be set aside. These will be properly labeled and returned to the warehouse. These will also be reported in a Non-Conformance Report to the QA/QC Engineer.
Supervisor and foreman will orient and familiarize all the plumbers and labors involved in the installations regarding the relevant approved shop drawings, technical submittals, installation procedures and details, acceptance criteria and safety requirements.
The supervisor and foreman will examine surfaces to receive drainage and vent pipe works for compliance with installation tolerances and other required conditions, as described in the drainage piping installation requirement.
Installation will not proceed until unsatisfactory conditions have been corrected.
Soffit Mounted Drainage Piping Installation
Transfer the pipes from the stores to the areas where it is to be installed.
Before laying all pipe and fittings shall be checked thoroughly for any damage/defects and joining spaces are cleaned properly.
Mark up the pipe routing on the soffit or slab as per the setting out.
Floor finish level reference line shall be marked on nearby RC column or wall for checking on gradient of pipe installation.
After identifying pipe routing, install anchor fasteners for supports as per the manufacturer recommendation for different pipe sizes.
Tie a thread between hanger rods (with gradient) at the straight pipe section and adjust height of thread to bottom of pipe level of uPVC pipes to be installed.
The bottom of the pipe level shall be checked against the floor finish reference line provided by the surveyor.
Gradient / slope of drainage pipe shall be as per approved shop drawings.
Cut hanger rods with cutting wheel machine to the required length and install anchor fastener for uPVC pipe supports as per the approved pipe support distances for different pipe sizes.
In horizontal installation, pipe clamps should be placed at intervals which are approximately ten times bigger than the pipe diameter. This will ensure that the installation is fixed and will not bend.
Install pipe hanger brackets and adjust level of pipe bracket to the required bottom of pipe level.
Install uPVC pipe on pipe hanger and fasten fasteners on pipe brackets & hanger rod.
Check and ensure that the pipe is securely supported on hanger brackets.
Connect pipe fittings to straight length pipe as per approved shop drawing.
Cleanouts shall be installed at each change of direction of drainage pipe.
Installation of Expansion joints to be provided at necessary locations specified in the approved shop drawing & as per manufacturer recommendation.
Wall Mounted Drainage Piping Installation
Identify vertical uPVC pipe position at site according to approved shop drawings and floor finish level, reference line shall be marked on nearby RC column for checking of branch pipe tee off level.
Plumb vertical line at 150mm away from actual pipe position and mark vertical uPVC pipe support position.
Adjust pipe support position against vertical plumb line to make sure that pipe support is vertically aligned.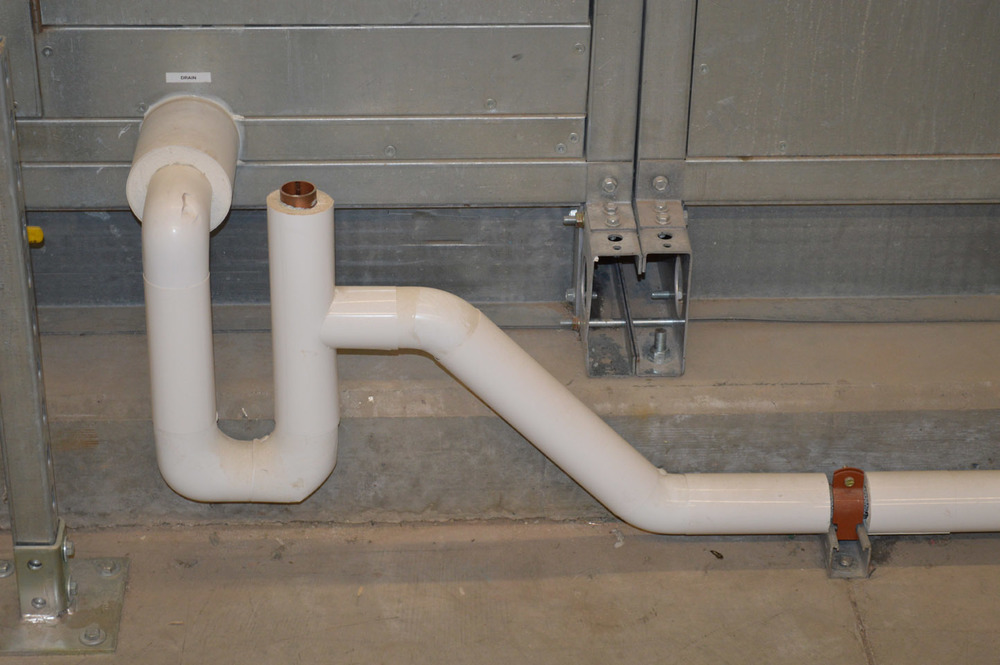
Mark out elevation of wall brackets using datum provided by surveyor. Do not assume that floor is at correct FFL.
After marking the pipe support position identify concrete anchor position and install concrete anchors for pipe support.
Pipe support for vertical uPVC shall be installed at base and at each floor. Install anchor support fastener as per approved support distances for different pipe sizes.
Install pipe support and fasten anchor bolt to secure support to building wall or structure.
Measure length of uPVC pipe required to be cut and mark cutting position on pipe with marker pen.
Cut pipe by using appropriate pipe cutter, square & perpendicular to its axis and clean all burrs on the cut end.
Install vertical uPVC pipe on pipe support and fasten pipe clamp to pipe support.
Use level spider to check vertical alignment of uPVC pipe.
Pipes shall be run with proper required slope as per approved shop drawing.
Check the required level for tee branch off and connect pipe tee or fitting to vertical pipe.
Jointing of uPVC Pipe
Rubber Ring (Push Fit) Type:
Pipes & fittings will be joints for push-fit type with sizes from 50mm up to 315mm.
File square cut pipe to provide 15° chamfer. (do not chamfer to a knife edge).
Lubricate rubber seal with suitable lubricant.
Push pipe fully into the socket.
Withdraw the pipe 5-10mm to allow for expansion.
Solvent Welding Type:
Pipes & fittings will joint for solvent welding type with sizes 20mm up to 50mm.
Cut pipe square de-burr and clean mating surfaces with cleaning fluid using dry, clean, natural cloth (not synthetic)
Coat mating surface with liquid weld (Solvent cement), using clean brush. Replace lid on container to prevent evaporation.
Assemble joint immediately with slight twisting action, removing any access cement with clean rag.
Initial set: 10 minutes
Final set: 12 hours
Inspection and Leak Testing of Drainage Pipes
All works shall be inspected for quality workmanship and conformance to specification prior to offering for inspection.
Notice of inspection shall be advised to the consultant for their discretionary attendance and witnessing. Notice shall be advised at least 24 hours prior to date of inspection.
The following procedure would be used for leak testing:
All pipes ends and connections must be plugged using suitable testing plugs.
Install vertical pipe length to the drain to provide the necessary testing water head.
Fill the system with water not less than 1.5meter head.
Check and inspect for leakages at all the connections of joints and pipe body.
Maintain the water level for 4 hours under testing, during which the system should be inspected by measuring the drop in water height. If leak detected, rectify / replace and tested again.
Once water test has been successfully carried out remove off all tests plugs and drain off water from pipeline.
Cover all ends of pipes & fittings to prevent debris from going into the pipeline and protect all time till final connection.
Checking the Slope of Drainage Pipe:
Select the spirit level that will rest against the drainage pipe you are measuring without contacting fittings or other obstacles. The level must rest only on the pipe.
Set the spirit level on the top of the pipe or hold it against the bottom. Note the position of the spirit level’s bubble, it should not be centered. Lift the end of the spirit level until the bubble is centered.
Measure the distance between the end of the spirit level and the pipe.
The distance is the slope of the pipe along the length of the spirit level.
The standard slope for most soil and waste pipe is 1 percent downward in direction of flow.
Verify that the slope is in the correct direction. The pipe must slope downward from the source of the water or waste toward the main sewer or septic pipe.
Fire Stopping Sealant Application for Drainage Pipes
All Mechanical penetration through Fire Rated walls and floors shall be provided with Fire stopping seals as per this method statement.
Fire stopping sealant application for mechanical services to be established in accordance with the approved material submittal.
Provide sleeves for piping passing through slab & wall, size of sleeves should be 25 mm annular clear space between piping and concrete slabs and walls.
Clean out opening to remove any debris which can delay closing action of the intumescent sealant.
Pack oversized openings with mineral wool (if required).
Apply fire stopping materials to the minimum depth as per manufacturer recommendation.
Smooth the surface by cleaning any excess sealant with water prior to curing.
Leave completed seal undisturbed for 48 hours minimum.